For detailed instructions on how to use this product, please click the link below to access the full user manual:
Click here📚
If you have any questions or need further assistance, feel free to contact our support team: support@maono.com
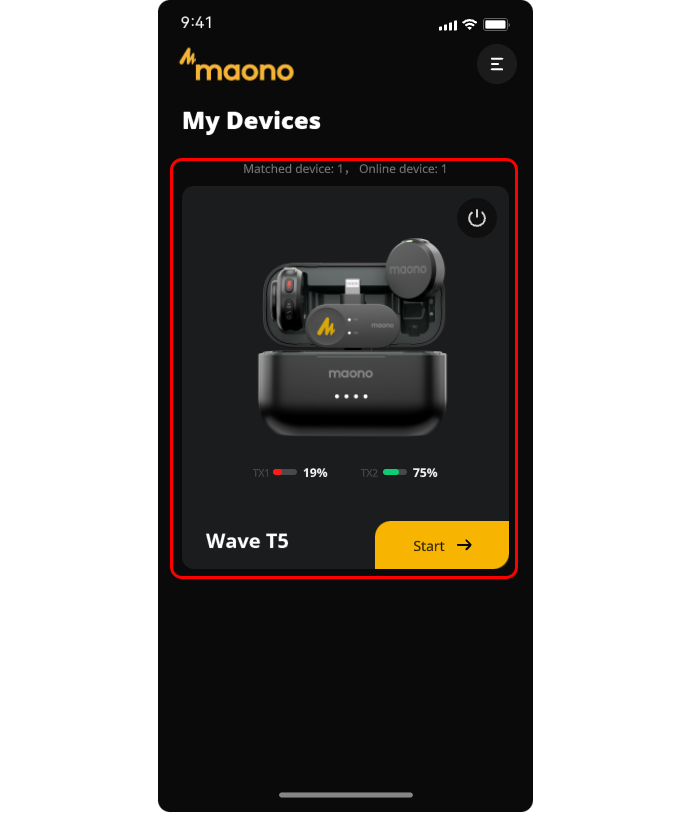
1. Wave T5 Connection
1.1 The mobile version uses the receiver Type C\ Lightning to connect to the mobile phone charging port, and the camera version uses the included dual-head USB Type C to connect to the mobile phone charging port;
1.2 After the mobile phone detects that the device is connected, the access will be highlighted, and the first access will automatically enter the product settings page;
2. Function Settings
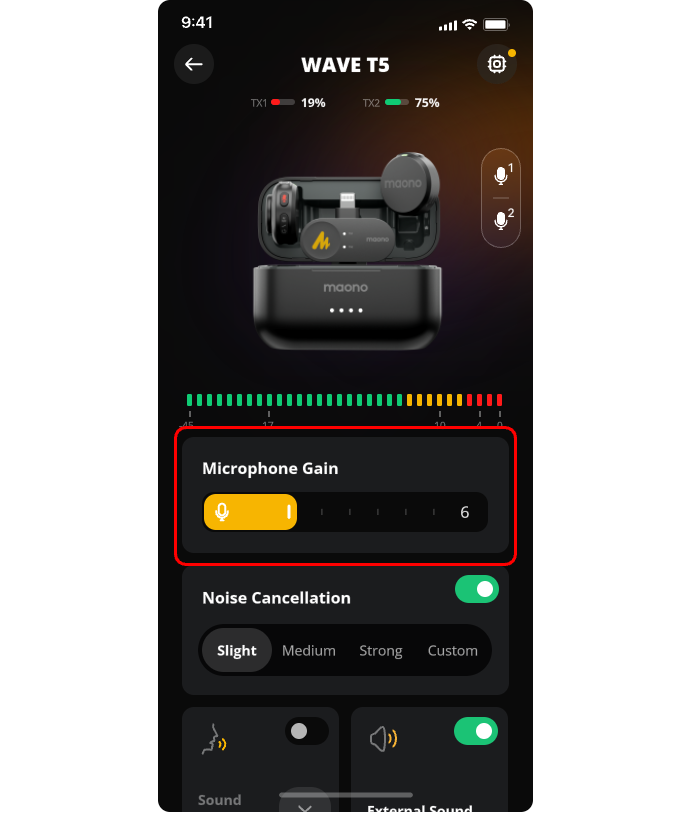
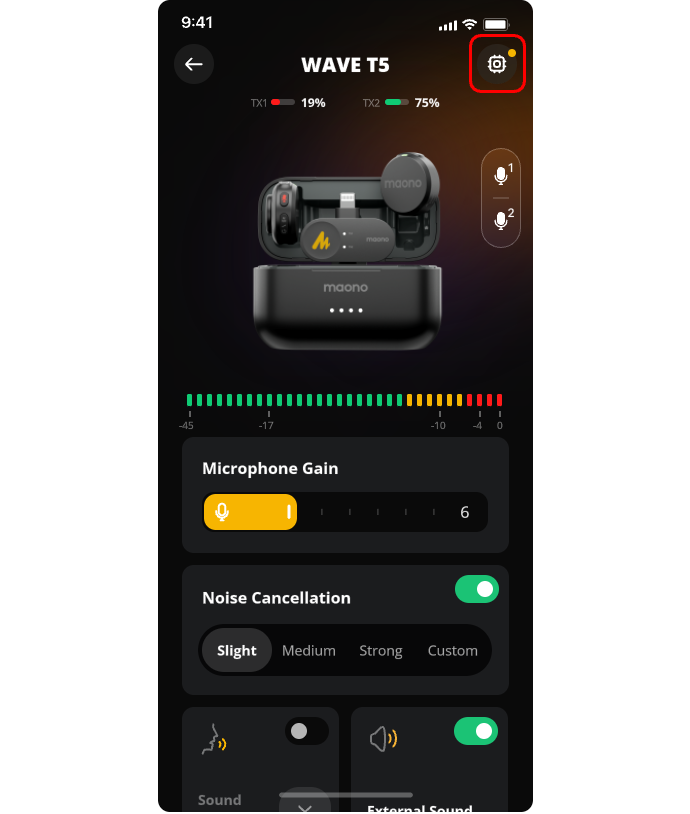
2.1. Battery: At the top of the app, you can see Mic1, Mic2, they have clear battery icons to display the current real-time power;
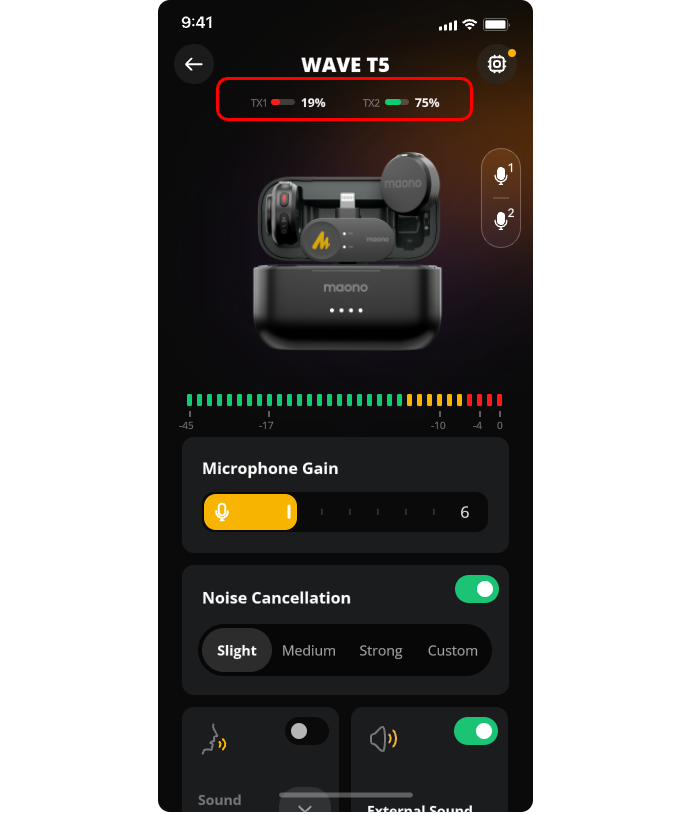
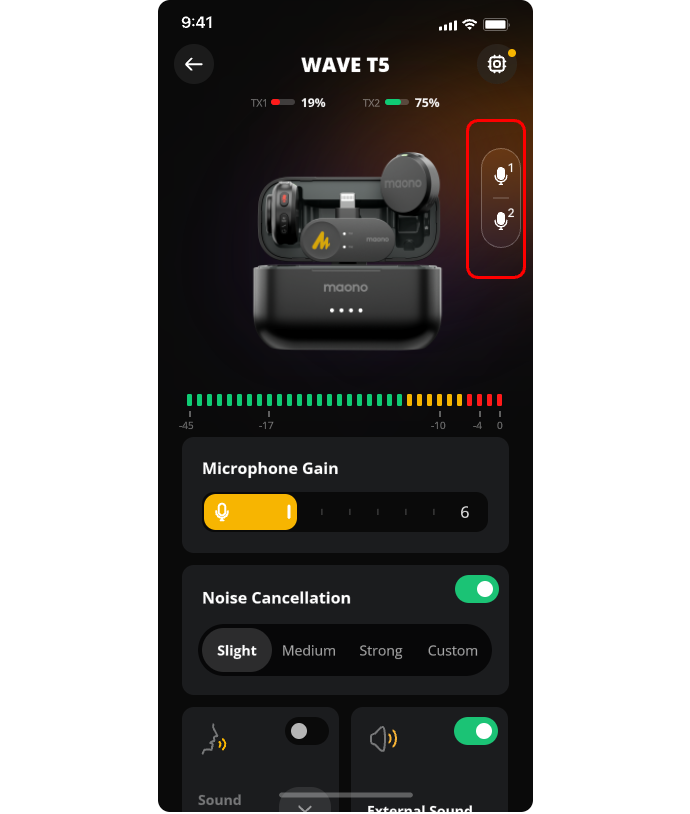
2.2. Mic Mute: Both of Mic1 and Mic2 icons on the right side of the product picture are used to display the current working status of Mic 1 and Mic2. When you press the "Mute" button on the microphone device, the device and receiver will display the current Mic mute status with lights, and the current mute status will also be displayed in real time on the APP; and when clicking Mic1 or Mic2 on the APP to switch to mute or normal, the receiver and device will also change the status indicator light, and they are synchronized;
2.3. Gain: There is a real-time level display on the APP. When you adjust the gain, the microphone will display the current level value in real time with the sound received; usually if you speak close to the Mic, you need a lower gain, and if you speak far from the microphone in your work scenario, you need to adjust a larger gain; you can test the sound received by the microphone before work to achieve the best radio effect;
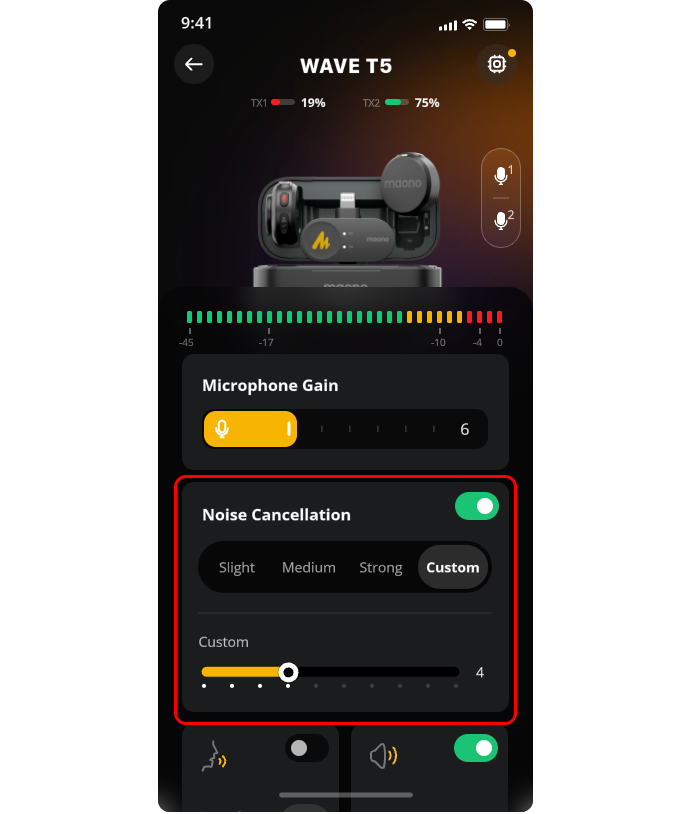
2.4. Noise Cancellation: Wave T5 We provide 3 levels of noise cancellation mode, "Slight, Moderate, Aggressive " and custom mode; you can set the appropriate noise cancellation mode according to the current ambient noise level; and if the three levels of noise cancellation mode are not well adapted to the current ambient noise level, you can use 14 levels of custom mode, and the custom parameters will be saved in real time;
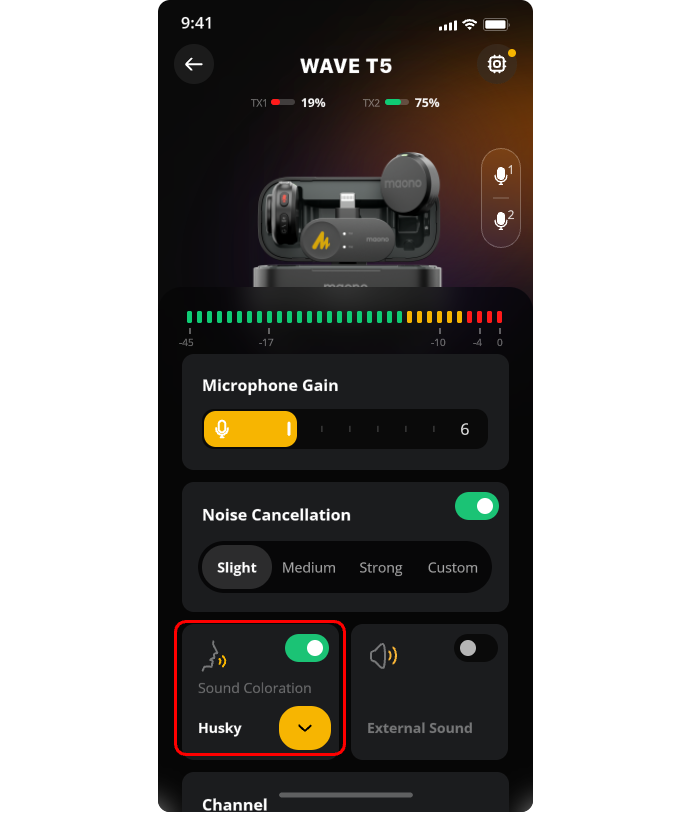
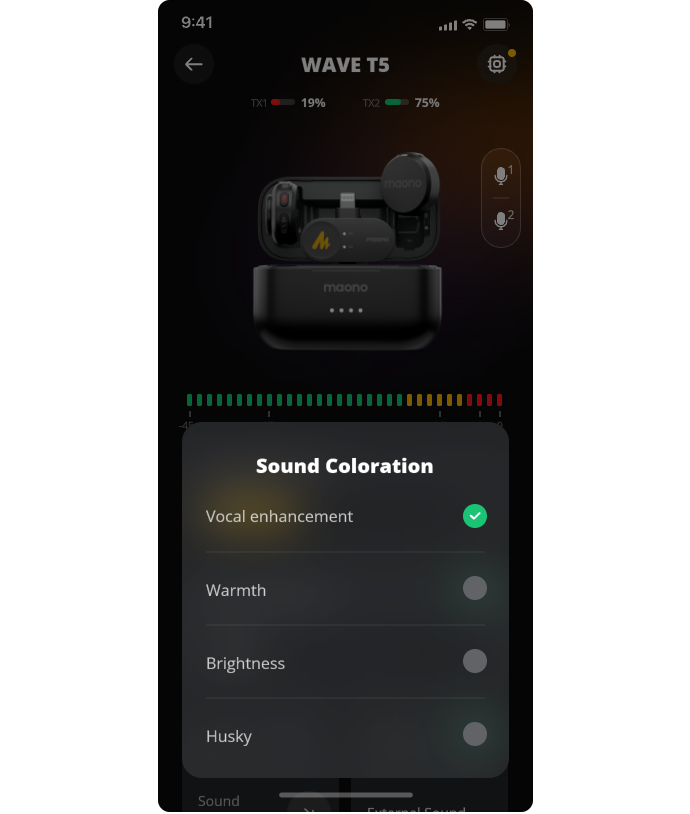
2.5. Sound Coloration: Vocal coloration is an important feature of the Wave T5. We have set up several of the four most important sounds to improve your recording experience. The options will display the sounds you have currently applied.
Click on the tab to see the following sound options:
"Vocal Enhancement": Highlight the presence of the vocal in the mix, while maintaining the natural authenticity;
"Warm": Soft, wrapping, similar to old-fashioned microphones or vinyl records;
"Bright": Enhances the transparency and space of the sound, making the sound crisp and layered, similar to the listening experience of a modern recording studio or electronic synthesizer;
"Magnetic": full of tension and contagion; You need to set it on the APP. After selecting the corresponding sound mode, it will take effect immediately;
2.6. Speaker Output: The speaker output function of the mobile phone is turned on in default. If you play music on the mobile phone, the sound will not be affected; if you do not need the external playback function, you can turn off this switch; when switching the external playback function, the wireless microphone will automatically restart, and there will be corresponding reminders on the mobile phone.
3. Firmware Upgrade
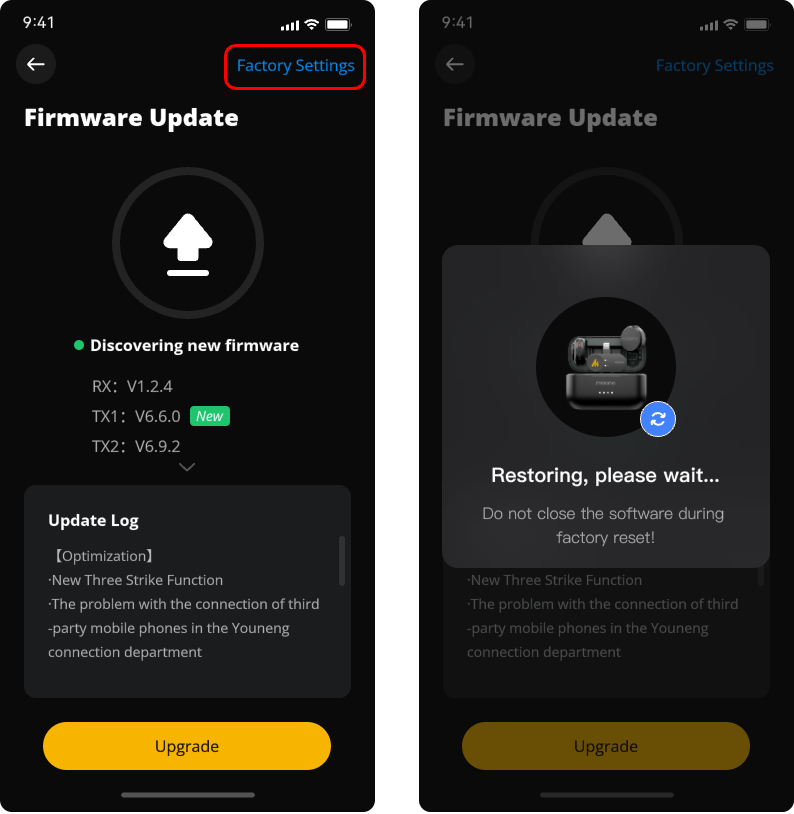
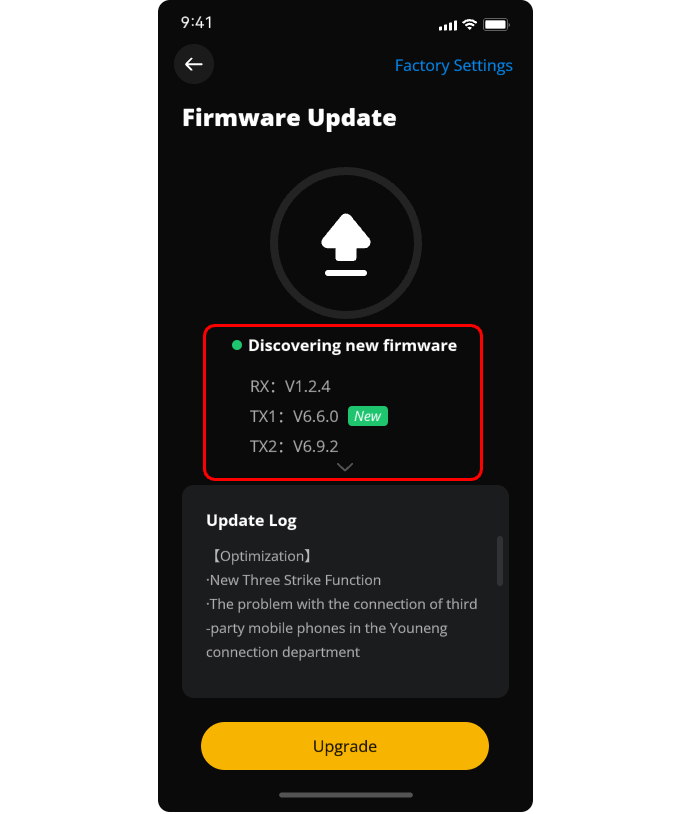
3.1. Firmware Setting: There is a firmware upgrade button in the upper right corner of the product page. If the current product has a firmware update, there will be a reminder.
Clicking to enter the firmware upgrade page will display the firmware version information of the current receiver and transmitter, and when a new firmware version is released, the current upgradable version number will be displayed.
3.2. Upgrade: Click "Upgrade Now" to select the receiver RX or transmitter TX1\ TX2 to be upgraded. There will be a progress prompt when upgrading.
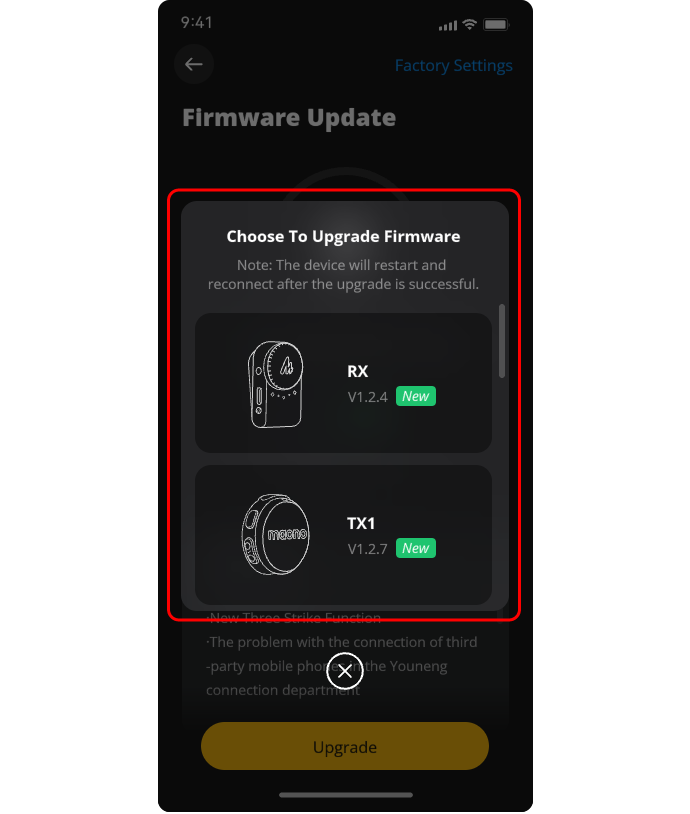
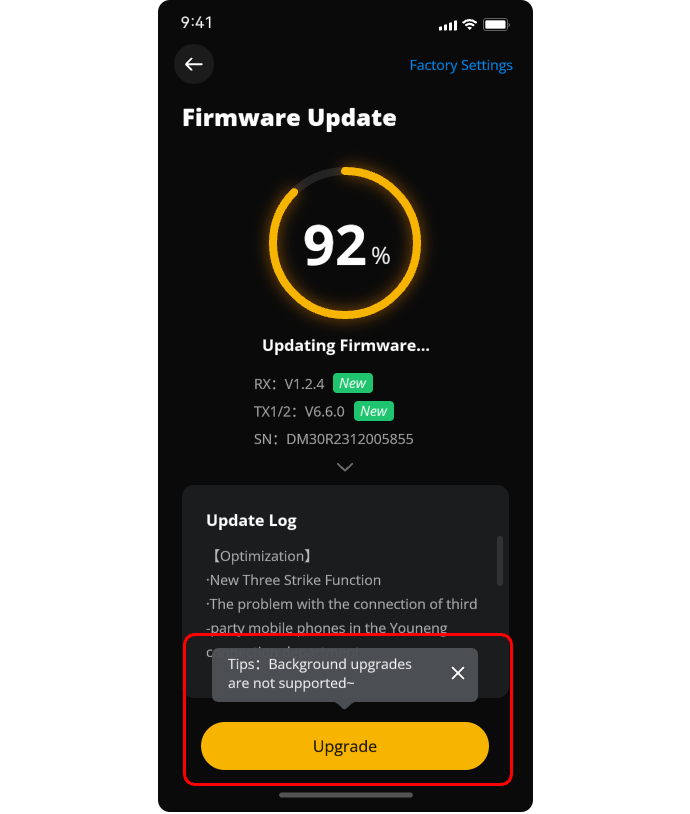
* Others: After updating the firmware, the device will restart, and the first restart will take about 30s. The specific time is subject to the reboot of the device.
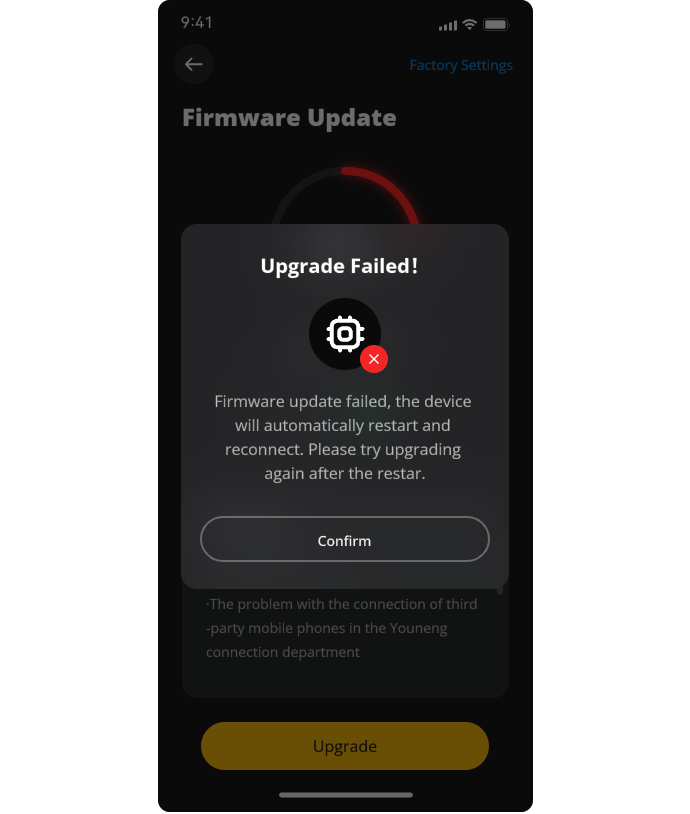
3.3. Upgrade Failure: When the firmware upgrade page prompts that the upgrade failed, please click Upgrade again according to the prompts.
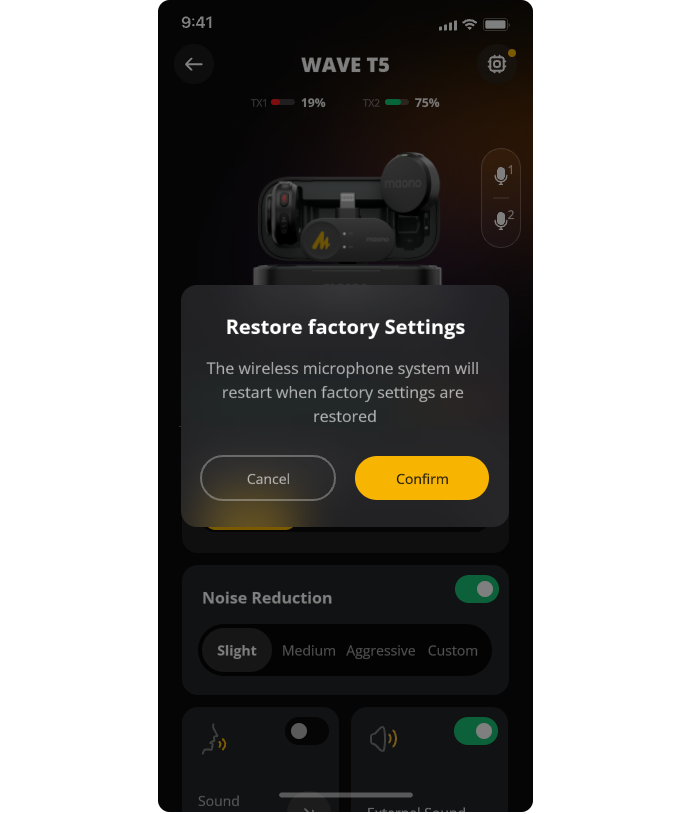
3.4. Factory Reset: The device may run abnormally in some cases, so you can reset the hardware parameters by restoring to factory settings. It will take a certain amount of time to restore to factory settings, please wait for the device to recover.